In the previous section we’ve identified that the WordPress core software, themes and plugins, create state in our Kubernetes pods, preventing us from scaling them out.
Note: all code samples from this section are available on GitHub.
In this article we’ll move that state away from pods. We’ll use the container version to control the core WordPress version and prevent core updates. We’ll put our plugins and themes into a Git repository and find out how Kubernetes init containers can pull that data in at runtime.
Preparing MariaDB
We’ll start off with a fairly clean slate here. We need OpenEBS installed and available in our cluster, along with a working DiskPool and our openebs-replicated StorageClass. The manifests for these are unchanged from our previous sections, and are available in the cluster directory for this project.
We’re going to use a Secret for MariaDB this time, which will contain the user, database name and password for our pod. You’ll later see a convenient way to get all these as environment variables in one go.
Here’s our mariadb.secrets.yml:
apiVersion: v1
kind: Secret
metadata:
  name: mariadb-secrets
stringData:
  MARIADB_USER: wordpress
  MARIADB_DATABASE: wordpress
  MARIADB_PASSWORD: secret
  MARIADB_RANDOM_ROOT_PASSWORD: "true"
Keep in mind that our MariaDB pod is still a StatefulSet, and will thus use our OpenEBS replicated volume for some data redundancy. Here’s our mariadb.statefulset.yml manifest:
apiVersion: apps/v1
kind: StatefulSet
metadata:
  name: mariadb
spec:
  selector:
    matchLabels:
      app: mariadb
  template:
    metadata:
      labels:
        app: mariadb
    spec:
      containers:
      - name: mariadb
        image: mariadb:10.11
        ports:
        - containerPort: 3306
        volumeMounts:
        - name: data
          mountPath: /var/lib/mysql
        envFrom:
        - secretRef:
            name: mariadb-secrets
This is mostly unchanged from our previous work. We’re using a volume mount named data which we’ll then reference in a claim template. We’ve also replaced the env section with an envFrom section that references our MariaDB secrets using secretRef.
Our volume claim templates, and retention policy in the StatefulSet are unchanged from previous sections:
  volumeClaimTemplates:
  - metadata:
      name: data
    spec:
      accessModes:
      - ReadWriteOnce
      storageClassName: openebs-replicated
      resources:
        requests:
          storage: 1Gi

  persistentVolumeClaimRetentionPolicy:
    whenDeleted: Delete
    whenScaled: Delete
The MariaDB Service manifest (mariadb.service.yml) will be unchanged from our previous sections, and will simply expose the 3306 port via a ClusterIP inside the Kubernetes cluster.
apiVersion: v1
kind: Service
metadata:
  name: mariadb
spec:
  ports:
  - port: 3306
  selector:
    app: mariadb
Let’s go ahead and start our MariaDB pod and service and make sure it’s running:
$ kubectl apply \
  -f mariadb.secrets.yml \
  -f mariadb.statefulset.yml \
  -f mariadb.service.yml
secret/mariadb-secrets created
statefulset.apps/mariadb created
service/mariadb created

$ kubectl get pods
NAME        READY   STATUS    RESTARTS   AGE
mariadb-0   1/1     Running   0          34s
Let’s move on to our WordPress service.
WordPress ConfigMaps and Secrets
Since our goal is to remove state from our WordPress service, it would now be more fitting to make a Deployment, rather than a StatefulSet. However, before working that there are a few things we need first.
We’re going to store our WordPress authentication keys, nonce keys and various salts in a Kubernetes Secret. Here’s our wordpress.secrets.yml manifest:
apiVersion: v1
kind: Secret
metadata:
  name: wordpress-secrets
stringData:
  WORDPRESS_DB_PASSWORD: secret
  WORDPRESS_AUTH_KEY: 7052c0863ea6269f44f0de17dc5c5879fdc02fd4
  WORDPRESS_SECURE_AUTH_KEY: e769128cb8376581e309a002466b1346910e8bd3
  WORDPRESS_LOGGED_IN_KEY: 9d3a12e80b9aa24c5a045f1f092e6ffb93f9823a
  WORDPRESS_NONCE_KEY: 2b4d5a460c2dde65380a47188b4b5ebbe723ab18
  WORDPRESS_AUTH_SALT: ba846d9aeefe6c706e5c93a750c1e4cd601e4408
  WORDPRESS_SECURE_AUTH_SALT: 667895c8d69089620e44a7f1a97b1ac3efc6e386
  WORDPRESS_LOGGED_IN_SALT: fcf21a031d5a54eab2c4749257829b0d2830ea7f
  WORDPRESS_NONCE_SALT: 6f3a1db3c6bd211d404e071a0ad1801c53e117dd
We’ve also put the WORDPRESS_DB_PASSWORD there, because it’s technically a secret.
Of course this now creates two places where that password exists (remember our MariaDB secrets manifest), but the convenience of adding these all in one go as env vars to a pod is really worth it, as well as the fact that the deployment could be created successfully, even if the MariaDB secrets don’t exist.
This isn’t a rule though or anything, so you’re more than welcome to reference a WordPress secret from a MariaDB manifest or vice versa.
Our wordpress.configmap.yml will contain two ConfigMaps, one for our Nginx configuration (yup, we’re ditching Apache again) and one for our WordPress container env vars:
apiVersion: v1
kind: ConfigMap
metadata:
  name: wordpress-nginx
data:
  wordpress.conf: |
    server {
      listen 80 default_server;
      server_name _;
      root /var/www/html;
      index index.php index.html;

      location / {
        try_files $uri $uri/ /index.php?$args;
      }

      location ~ \.php$ {
        include fastcgi_params;
        fastcgi_param SCRIPT_FILENAME $document_root$fastcgi_script_name;
        fastcgi_pass 127.0.0.1:9000;
      }
    }
Unchanged from our previous examples. However do note that we’ll no longer be running Nginx pods separately from WordPress pods, so the fastcgi_pass directive will be pointed to the 127.0.0.1 address at the FastCGI port, rather than a separate service.
The reason we want the Nginx container stuck to (and ultimately scaled with) our WordPress container, is because in addition to proxying requests to a FastCGI service, Nginx will still need the ability to serve static files, such as images, JavaScript and CSS that live in the same codebase. These files will be available to the pod as a whole, so all containers can read the same volume.
Alternatively, we’d have to mount a separate copy of the codebase to the Nginx pods, and then somehow synchronise the deployments too. Definitely possible, but not ideal for our scenario.
Our second ConfigMap in the same file will be our wordpress-env:
---
apiVersion: v1
kind: ConfigMap
metadata:
  name: wordpress-env
data:
  WORDPRESS_DB_HOST: mariadb
  WORDPRESS_DB_USER: wordpress
  WORDPRESS_DB_NAME: wordpress
  WORDPRESS_CONFIG_EXTRA: |
    define( 'WP_AUTO_UPDATE_CORE', true );
    define( 'DISALLOW_FILE_EDIT', true );
    define( 'DISALLOW_FILE_MODS', true );
These will be mounted as env vars into our WordPress container. The WORDPRESS_CONFIG_EXTRA variable is a bit of a special one and any PHP code there will be evaluated at runtime. This allows us to add custom definitions and any extra code we need to run very early.
The definitions above will prevent WordPress from updating itself. They will also prevent WordPress from making any file edits or modifications on the filesystem, which means users won’t be able to install a new plugin for example. This is exactly the kind of stateless behavior we want.
Note that you wouldn’t want to evaluate PHP code at runtime in a production environment for various reasons. It would be better to ship your own custom version of a wp-config.php file into the container, but for testing purposes it is more than okay.
Let’s write our ConfigMaps and Secrets to our Kubernetes cluster:
$ kubectl apply \
  -f wordpress.configmap.yml \
  -f wordpress.secrets.yml

configmap/wordpress-nginx created
configmap/wordpress-env created
secret/wordpress-secrets created
We’ll be making some changes to our Secrets when pulling in a Git repository, but for now this will work. Let’s move on to our WordPress Deployment.
WordPress Deployment
We’ll start with just a single replica for now until we’ve successfully removed all state from our WordPress pod. As mentioned above, we’re also going to couple in our Nginx containers into the WordPress pods, to make sure we can serve those static files.
Here’s our wordpress.deployment.yml manifest:
apiVersion: apps/v1
kind: Deployment
metadata:
  name: wordpress
spec:
  replicas: 1
  selector:
    matchLabels:
      app: wordpress
  template:
    metadata:
      labels:
        app: wordpress
    spec:
      containers:
      - name: wordpress
        image: wordpress:6.5.5-fpm
        ports:
        - containerPort: 9000
        volumeMounts:
        - name: www-data
          mountPath: /var/www/html
        envFrom:
        - secretRef:
            name: wordpress-secrets
        - configMapRef:
            name: wordpress-env

      - name: nginx
        image: nginx:1.27.0
        ports:
        - containerPort: 80
        volumeMounts:
        - name: www-data
          mountPath: /var/www/html
          readOnly: true
        - name: nginx
          mountPath: /etc/nginx/conf.d
          readOnly: true

      volumes:
      - name: www-data
        emptyDir: {}
      - name: nginx
        configMap:
          name: wordpress-nginx
This should mostly be familiar territory by now. The envFrom section sets environment variables from our ConfigMap and Secret defined earlier.
The www-data volume is an emptyDir type volume, which allocates an empty directory on the Kubernetes node. It is not a persistent volume and the data will be destroyed when the pod is destroyed, however it does allow us to share the files between containers within the same pod. As you can see, it’s mounted into both the WordPress container, as well as the Nginx container. It’s quite similar to a named volume in Docker terms.
The second nginx volume is a configMap type volume, which brings our wordpress.conf Nginx configuration to the appropriate container.
We’ve also defined the WordPress image as wordpress:6.5.5-fpm which is specific down to the minor/patch version. This is a good practice and guarantees you’re always going to run pods with the exact same version side-by-side.
Don’t forget about the wordpress.service.yml manifest:
apiVersion: v1
kind: Service
metadata:
  name: wordpress
spec:
  type: NodePort
  ports:
  - port: 80
    nodePort: 30007
  selector:
    app: wordpress
Let’s add our Service and Deployment objects to the Kubernetes cluster and confirm we’re up and running:
$ kubectl apply \
  -f wordpress.deployment.yml \
  -f wordpress.service.yml
deployment.apps/wordpress created
service/wordpress created

$ kubectl get pods
NAME                         READY   STATUS    RESTARTS   AGE
mariadb-0                    1/1     Running   0          80m
wordpress-5c8889588b-r576p   2/2     Running   0          22s

$ kubectl get svc
NAME         TYPE        CLUSTER-IP      EXTERNAL-IP   PORT(S)        AGE
kubernetes   ClusterIP   10.100.0.1      <none>        443/TCP        16d
mariadb      ClusterIP   10.100.126.18   <none>        3306/TCP       80m
wordpress    NodePort    10.100.9.171    <none>        80:30007/TCP   35s
As we’re probably now used to, WordPress is running on port 30007 and available via any node in the Kubernetes cluster. Go ahead and run through the WordPress installation process.
After logging into the WordPress dashboard, you’ll see that everything works as expected, however we lost the ability to install themes or plugins. Let’s sort that out next.
Themes and Plugins via Git
As we hinted in earlier sections, there are multiple correct ways to get your application code into a Kubernetes container. We’re going to explore one of those ways here and that’s through a remote Git repository.
This is a very simple approach, but it does have some drawbacks:
- You need connectivity to the Git repository at all times
- Starting a new pod will need to pull down the entire Git repository
- There is no build process or any other intermediary steps
- Requires a separate deployment step to push changes
We’ll be exploring some more ways to build and deploy WordPress applications with webhooks, actions and everything else, but for now simply pulling down the codebase from a Git repository will suffice.
We will be using GitHub of course, and a private Git repository, so go ahead and create a new one. Inside this repository let’s add a wp-content/mu-plugins/test.php file. This mu-plugin will be automatically enabled in our WordPress install:
$ cd path/to/repo
$ mkdir -p wp-content/mu-plugins
$ echo "<?php die( 'it works!' );" > wp-content/mu-plugins/test.php
Not a very useful plugin, but we just need to get the ball rolling for now.
Since this is going to be a private repository we’ll need a way to pull the code down in our Kubernetes cluster. GitHub conveniently provides Deploy Keys for this specific use case.
Let’s create a new SSH key with an empty passphrase:
$ ssh-keygen -t ed25519 -C "deploy key" -f deploy.key -P ""
Generating public/private ed25519 key pair.
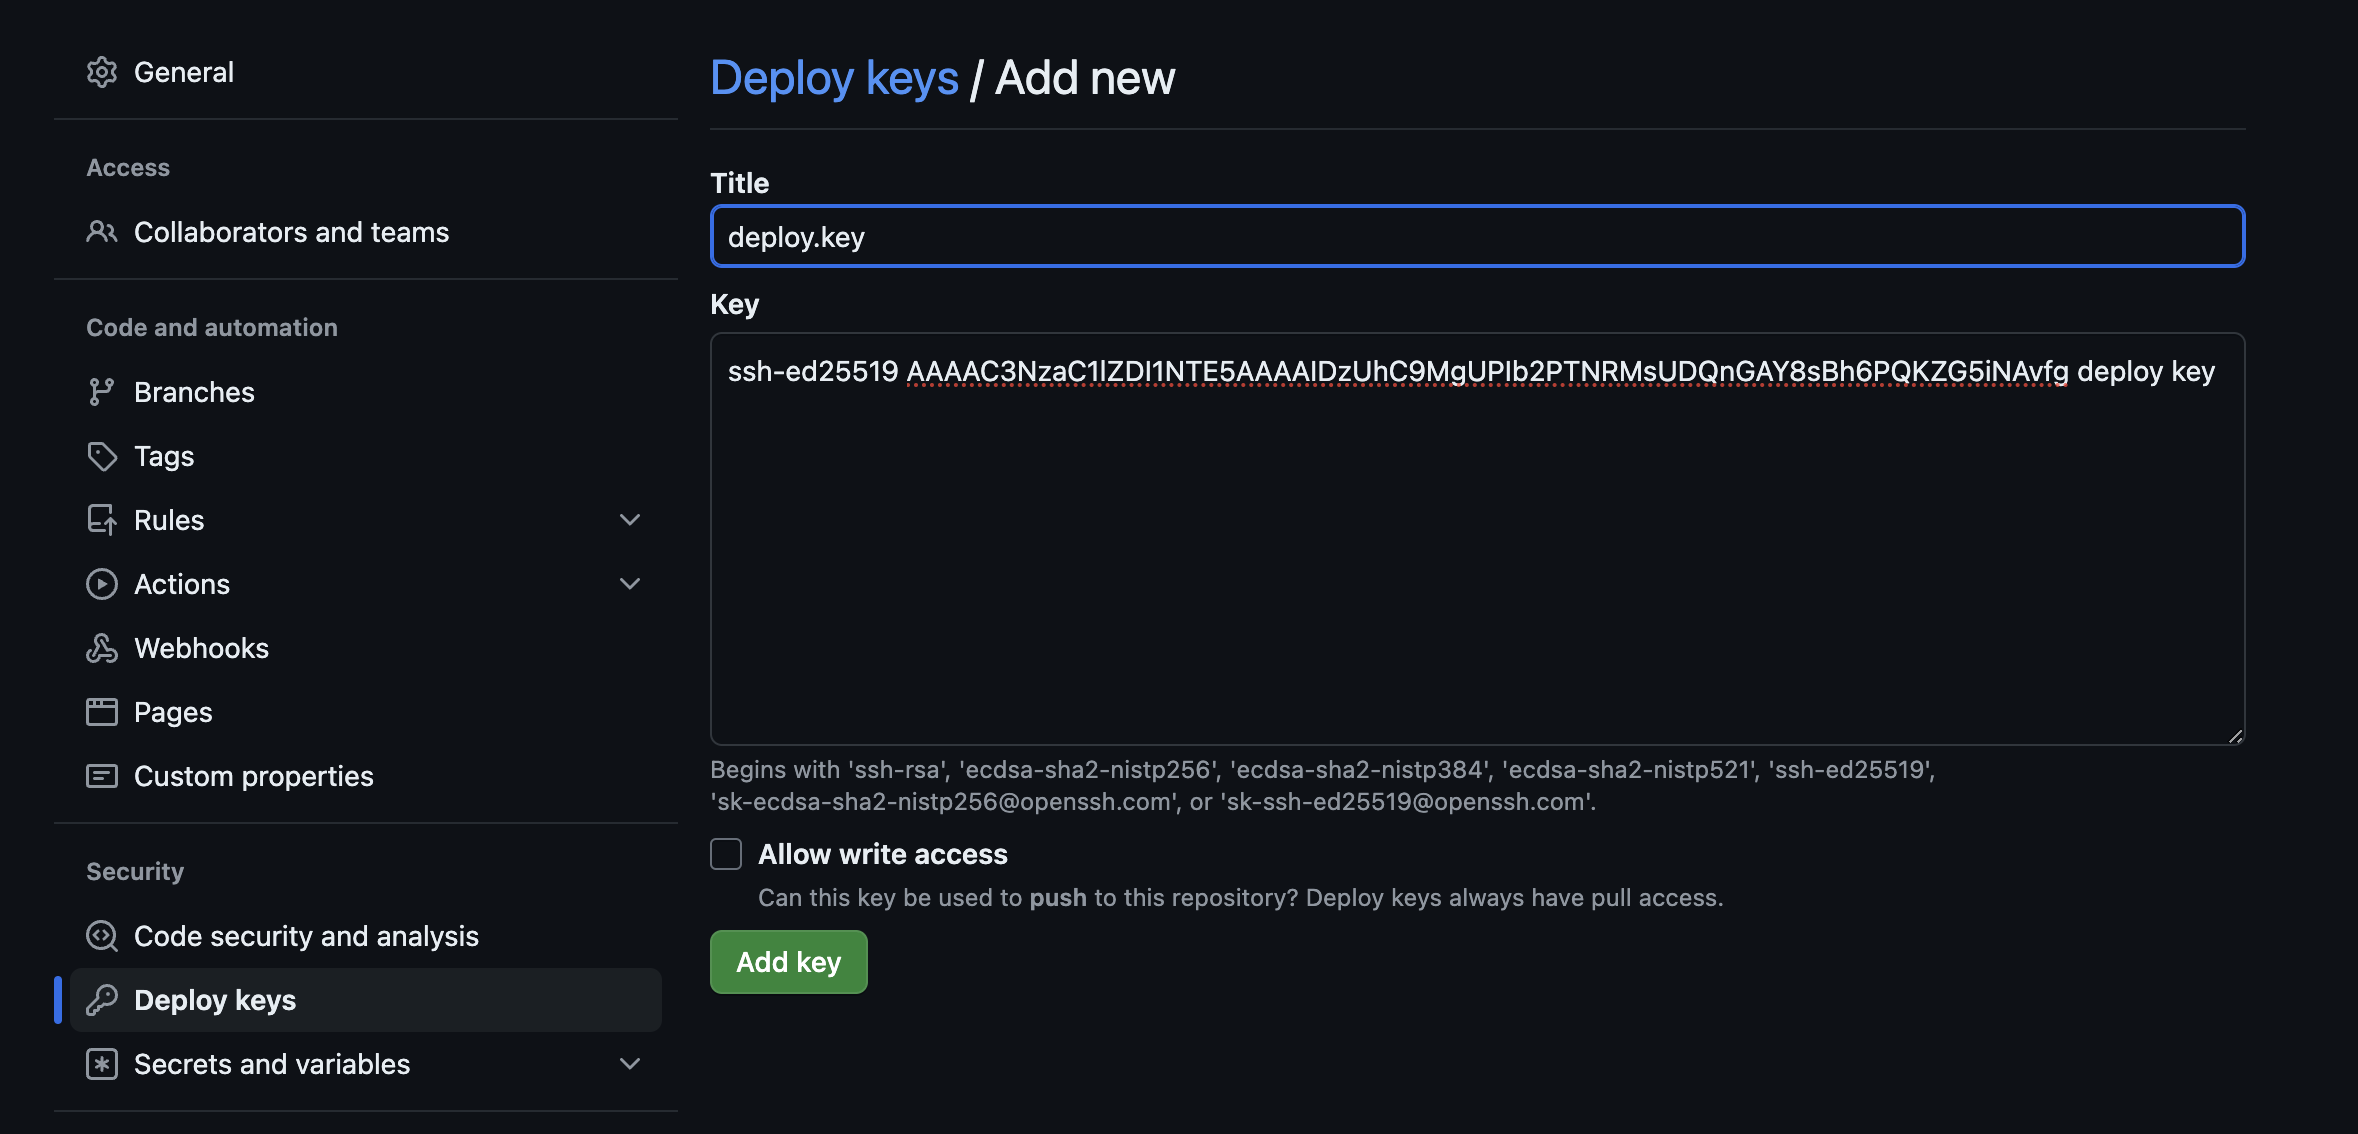
The public part of they key should be added to the GitHub repository under Settings – Deploy keys:
$ cat deploy.key.pub
ssh-ed25519 AAAAC3NzaC1lZDI1NTE5AAAAIDzUhC9MgUPIb2PTNRMsUDQnGAY8sBh6PQKZG5iNAvfg deploy key
The private key should be added to a Kubernetes Secret, which our container could then use to authenticate with GitHub and pull down the repository contents.
$ cat deploy.key
-----BEGIN OPENSSH PRIVATE KEY-----
b3BlbnNzaC1rZXktdjEAAAAABG5vbmUAAAAEbm9uZQAAAAAAAAABAAAAMwAAAAtzc2gtZW
QyNTUxOQAAACA81IQvTIFDyG9j0zUTLFA0JxgGPLAYej0CmRuYjQL34AAAAJDGz89Bxs/P
QQAAAAtzc2gtZWQyNTUxOQAAACA81IQvTIFDyG9j0zUTLFA0JxgGPLAYej0CmRuYjQL34A
AAAEB036W7kwJ8DQYCuyuM1vfjmxqBnG8yBGMKfkhcTcKVZjzUhC9MgUPIb2PTNRMsUDQn
GAY8sBh6PQKZG5iNAvfgAAAACmRlcGxveSBrZXkBAgM=
-----END OPENSSH PRIVATE KEY-----
Let’s add the contents of this key to a new Secret within our wordpress.secrets.yml manifest.
---
apiVersion: v1
kind: Secret
metadata:
  name: wordpress-dotssh
stringData:
  id_rsa: |
    -----BEGIN OPENSSH PRIVATE KEY-----
    b3BlbnNzaC1rZXktdjEAAAAABG5vbmUAAAAEbm9uZQAAAAAAAAABAAAAMwAAAAtzc2gtZW
    QyNTUxOQAAACA81IQvTIFDyG9j0zUTLFA0JxgGPLAYej0CmRuYjQL34AAAAJDGz89Bxs/P
    QQAAAAtzc2gtZWQyNTUxOQAAACA81IQvTIFDyG9j0zUTLFA0JxgGPLAYej0CmRuYjQL34A
    AAAEB036W7kwJ8DQYCuyuM1vfjmxqBnG8yBGMKfkhcTcKVZjzUhC9MgUPIb2PTNRMsUDQn
    GAY8sBh6PQKZG5iNAvfgAAAACmRlcGxveSBrZXkBAgM=
    -----END OPENSSH PRIVATE KEY-----
  known_hosts: |
    github.com ecdsa-sha2-nistp256 AAAAE2VjZHNhLXNoYTItbmlzdHAyNTYAAAAIbmlzdHAyNTYAAABBBEmKSENjQEezOmxkZMy7opKgwFB9nkt5YRrYMjNuG5N87uRgg6CLrbo5wAdT/y6v0mKV0U2w0WZ2YB/++Tpockg=
    github.com ssh-rsa AAAAB3NzaC1yc2EAAAADAQABAAABgQCj7ndNxQowgcQnjshcLrqPEiiphnt+VTTvDP6mHBL9j1aNUkY4Ue1gvwnGLVlOhGeYrnZaMgRK6+PKCUXaDbC7qtbW8gIkhL7aGCsOr/C56SJMy/BCZfxd1nWzAOxSDPgVsmerOBYfNqltV9/hWCqBywINIR+5dIg6JTJ72pcEpEjcYgXkE2YEFXV1JHnsKgbLWNlhScqb2UmyRkQyytRLtL+38TGxkxCflmO+5Z8CSSNY7GidjMIZ7Q4zMjA2n1nGrlTDkzwDCsw+wqFPGQA179cnfGWOWRVruj16z6XyvxvjJwbz0wQZ75XK5tKSb7FNyeIEs4TT4jk+S4dhPeAUC5y+bDYirYgM4GC7uEnztnZyaVWQ7B381AK4Qdrwt51ZqExKbQpTUNn+EjqoTwvqNj4kqx5QUCI0ThS/YkOxJCXmPUWZbhjpCg56i+2aB6CmK2JGhn57K5mj0MNdBXA4/WnwH6XoPWJzK5Nyu2zB3nAZp+S5hpQs+p1vN1/wsjk=
    github.com ssh-ed25519 AAAAC3NzaC1lZDI1NTE5AAAAIOMqqnkVzrm0SdG6UOoqKLsabgH5C9okWi0dh2l9GKJl
We’ve added a wordpress-dotssh secret alongside our existing wordpress-secrets object, and you might have also noticed that we have a known_hosts entry there too! Let’s quickly run through this.
The container we’ll be using to pull down our Git repository does not know about the existence of GitHub, so just like any new SSH connection, it will want to ask our permission to connect to this new host. We can explicitly grant this permission by supplying a known_hosts file, which contains the known identifies for GitHub.
To obtain these identities from GitHub, simply run ssh-keyscan github.com
The plan is to mount this wordpress-dotssh secret into the ~/.ssh directory inside our container, so ~/.ssh/id_rsa and ~/.ssh/known_hosts files will both be available when we run our git executable.
Let’s apply the new secret:
$ kubectl apply -f wordpress.secrets.yml
secret/wordpress-secrets configured
secret/wordpress-dotssh created
At this point we have an SSH deploy key, shared between GitHub and our Kubernetes cluster. We have a Git repository with a little mu-plugin. Let’s now update our wordpress.deployment.yml manifest to pull down our new codebase.
Using initContainers
initContainers in Kubernetes are separate containers that can as part of a pod during the initialization phase. These are useful to run things that main containers may lack, like a Git executable for example. Volumes can of course be shared between the Init container and the other containers.
We’re going to use the alpine/git container as our Init Container. We’re going to give it our SSH private key along with our known_hosts file. We’ll ask it to clone a repository from GitHub and place the contents into a directory, which will then be available to our Nginx and WordPress containers.
Let’s update our wordpress.deployment.yml manifest. The volumes section will now look like this:
      volumes:
      - name: www-data
        emptyDir: {}
      - name: wordpress-dotssh
        secret:
          secretName: wordpress-dotssh
          defaultMode: 0600
      - name: nginx
        configMap:
          name: wordpress-nginx
We’ve added our wordpress-dotssh secret along with a default permissions mode of 0600, which is a requirement for SSH private keys. Next, let’s update our template spec section to begin with our new initContainers:
    spec:
      initContainers:
      - name: init
        image: alpine/git
        args:
        - clone
        - [email protected]:koddrio/k8s-sample-application.git
        - /var/www/html
        volumeMounts:
        - name: www-data
          mountPath: /var/www/html
        - name: wordpress-dotssh
          mountPath: /root/.ssh/
          readOnly: true

      containers:
      - name: wordpress
      # ...
As you may have guessed, initContainers can have more than one entry, and they’ll be executed in order when using multiple. We’re mounting our www-data volume to /var/www/html, which is also the directory where we clone our repository. The SSH key and known_hosts files are mounted to the /root/.ssh/ directory.
Let’s update our WordPress deployment and look at our pods:
You’ll see that the resulting pod will now have an Init state. When troubleshooting, we can grab the logs from any of the containers (including init containers) by name, in our case it’s called init:
$ kubectl logs wordpress-54df96d9b-4x2k2 -c init
Cloning into '/var/www/html'...
If everything went smoothly and the pod is now up and running, we should see our little message by browsing to the service port:
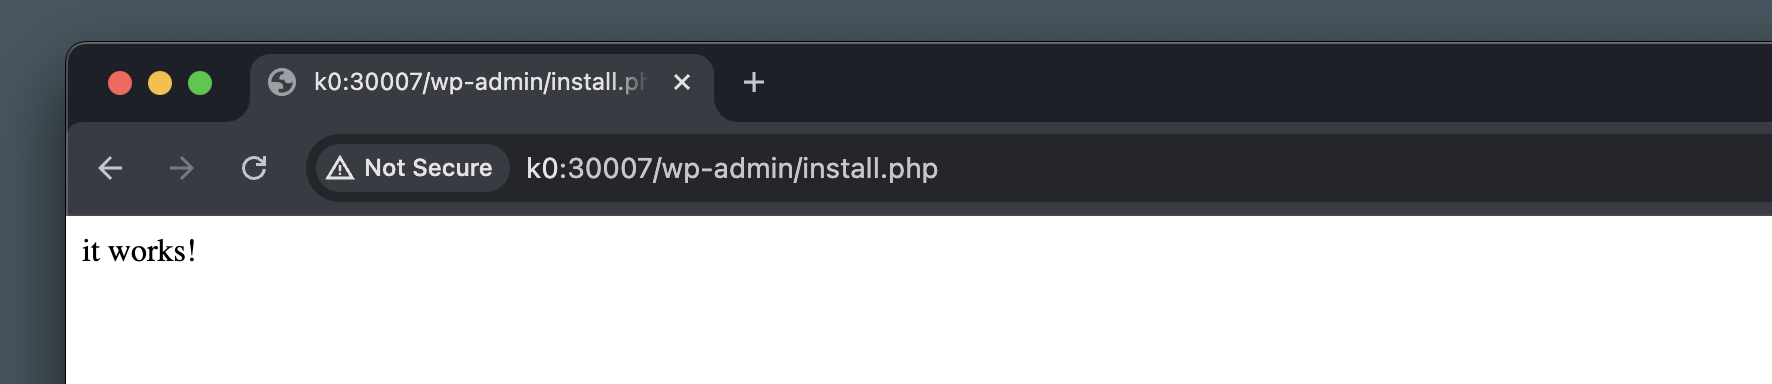
That would mean that our repository has been cloned successfully, and our not-so-useful mu-plugin is running as expected.
Deploying
Go ahead an delete the mu-plugin, and add something more useful, like a theme in wp-content/themes or some plugins in wp-content/plugins directories.
$ mkdir -p wp-content/plugins
$ cd wp-content/plugins
$ wget https://downloads.wordpress.org/plugin/query-monitor.zip
$ unzip query-monitor.zip && rm query-monitor.zip
$ git add query-monitor
$ git commit -m "Add the query-monitor plugin"
$ git push
After pushing these to your repository, you can force Kubernetes to create new pods for your deployment:
$ kubectl rollout restart deployment/wordpress
deployment.apps/wordpress restarted
Note that this only works because our Init container is cloning the repository main branch every time a new Pod is created by the deployment. This also means that in a scaling event, we may accidentally end up running Pods with a different version of the codebase.
Just like we’re sticking our WordPress core files to a very specific version, we should stick our plugins/themes repository codebase to a very specific commit hash, to ensure each pod is running the exact same version. Here’s an updated initContainers section:
      initContainers:
      - name: init
        image: alpine/git
        command:
        - /bin/sh
        - -c
        args:
        - cd /var/www/html;
          git clone [email protected]:koddrio/k8s-sample-application.git .;
          git reset --hard $HASH;
          rm -rf .git
        env:
        - name: HASH
          value: c46b84de47efdbb249f93478a6c2e4b1180e005d
        volumeMounts:
        # ...
The alpine/git container runs the git command by default, so with a command argument we can tell Kubernetes to run sh -c instead, and give it a string of shell commands in an argument. The key difference here is that we git reset the repository to the specific commit has which we set in an environment variable.
We also delete the .git directory at the end, to make sure that can’t be accidentally exposed through Nginx. In a more complex scenario (as you will see in alter sections) we would have a build phase with these and other things.
Now, after changing the commit hash in the env variable and re-applying the deployment, Kubernetes will immediately replace our running pods with new ones, similar to changing the WordPress or Nginx container versions.
For development and testing though, feel free to set the hash to origin/main or another branch name, so that you wouldn’t need to figure out the latest commit hash every time you want to test something quickly.
What’s next?
In this section we changed our WordPress application to a Deployment in Kubernetes, we used the WP_AUTO_UPDATE_CORE, DISALLOW_FILE_EDIT and DISALLOW_FILE_MODS constants to stop WordPress from updating itself, and from being able to install plugins and themes (or translations) from the Dashboard.
We created a private Git repository on GitHub, generated and configured Deploy SSH keys to make sure our Kubernetes cluster can access the private repository. We used an Init container with our WordPress deployment, which uses the SSH key to pull the private repository contents into a volume, shared with the WordPress and Nginx containers.
We’re still missing one piece of the stateless puzzle and that’s Media. We need to make sure our users’ uploads are not stored inside our WordPress containers, which will help make them truly stateless. We’ll look at solving this problem in the next section with MinIO and S3 Uploads for WordPress.