Kubernetes Ingress via Cloudflare
Cloudflare is a popular content delivery network (CDN) and reverse proxy, used quite extensively in the WordPress space. It has a ton of great features available to most users completely for free, from DNS to edge caching, plenty of security features and more.
However, one of the most overlooked features is Cloudflare Tunnels. These allow you to connect your applications the Cloudflare network, without having or needing any publicly routable IP addresses. This is great for Kubernetes clusters in general, but an absolute goldmine for private clusters, or clusters behind dynamic and unpredictable IPs.
In this section, we’ll configure a Cloudflare Tunnel to make our existing Kubernetes-hosted WordPress application publicly available to the Internet.
Note: all code samples from this section are available on GitHub.
Back to the basics
You can run Cloudflare Tunnels side-by-side with various Ingress Controllers, MetalLB and other ways of getting traffic into your cluster, however, for the purpose of this tutorial, let’s have Cloudflare be the only public way to our WordPress application.
If you’ve been following this tutorial so far, you’ll need to remove any existing Ingress, Ingress Controllers and MetalLB resources from the cluster (your releases/versions may vary).
$ helm uninstall ingress-nginx
release "ingress-nginx" uninstalled

$ kubectl delete -f https://raw.githubusercontent.com/metallb/metallb/v0.14.9/config/manifests/metallb-native.yaml
namespace "metallb-system" deleted
customresourcedefinition.apiextensions.k8s.io "bfdprofiles.metallb.io" deleted
...

$ kubectl delete ingress wordpress-ingress
ingress.networking.k8s.io "wordpress-ingress" deleted
If starting fresh, make sure you have a working WordPress service accessible within the cluster:
$ kubectl get svc wordpress
NAME        TYPE        CLUSTER-IP       EXTERNAL-IP   PORT(S)   AGE
wordpress   ClusterIP   10.100.144.185   <none>        80/TCP    50d
Let’s move on to installing and configuring a Cloudflare Tunnel.
Installing Cloudflared
First, we’ll need to create a new tunnel in Cloudflare. Assuming you already have an account with some domain that you can use, head over to Cloudflare Zero Trust, then to Networks – Tunnels – Create a tunnel.
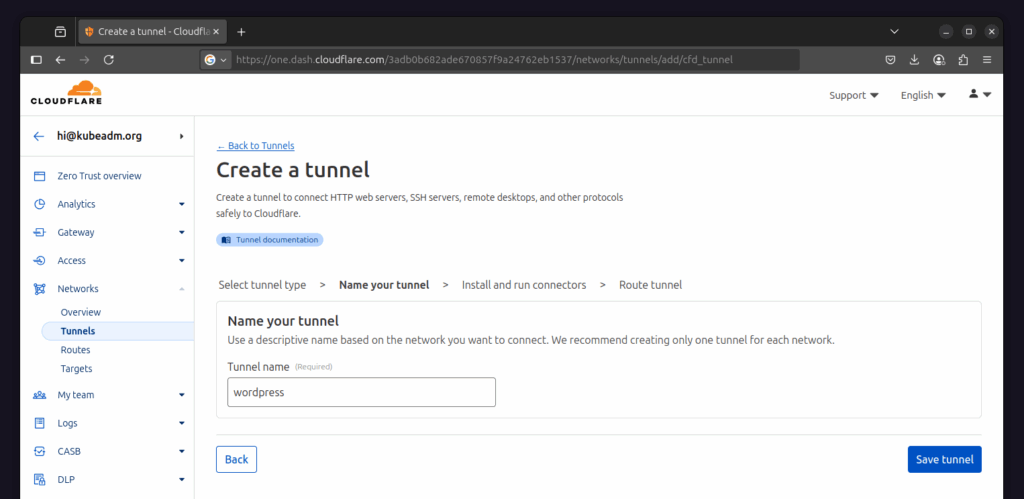
Select the Cloudflared tunnel type and give it a name. We’re using the name “wordpress” in this example. On the next screen, you’ll be given a command to run the Cloudflare Tunnel daemon, along with some instructions on how to install it on various systems.
This article is for premium members only. One-time payment of $185 unlocks lifetime access to all existing and future content on kubeadm.org, including all reference architectures.
Already a member? Login here
Getting Started
Running WordPress
Scaling WordPress
Scaling the Database
Caching
Ingress